Here’s a detailed step-by-step account of how I created this painting; from beginning to end.
 |
|
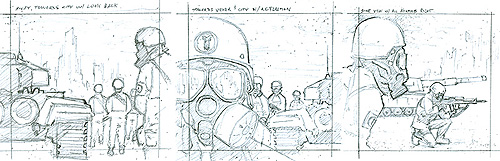
ThumbnailsThis is where it all begins… laying out a good composition. I did these three variations to give the client options. The first one was a direct interpretation of their request. Not content, I worked up a couple other ideas for a stronger visual. My vote was for the middle one. |
|
 Pencils |
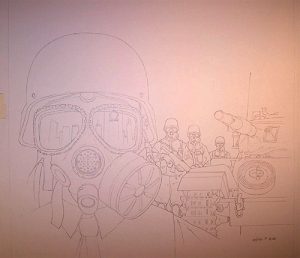
PencilsOnce I received the go-ahead from the client, I proceeded to turn the thumbnail image into a highly detailed drawing on a sheet of Strathmore 400 Series Bristol Board. Although my intention for the client’s application was going to be the half mask, I decided to include the entire head in the painting. The pencils took about 5 hours. |
 5hrs in |
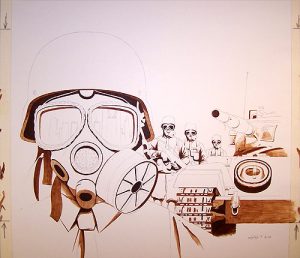
5hrs inThis time includes preparation to the drawing to make it ready to paint on. Tape off the painting space with masking tape. Then, several layers of Liquitex Matte Medium are applied; to provide a painting base and texture to the applied paint. Once everything has dried and the paper has flattened out, I begin to paint the darkest spots; line work and solid shadows.I use Golden Heavy Body Acrylics. I seldom use black in my paintings. The closest I ever get is using Paynes Grey or Raw Umber.I start layering in the mid-tones of the shadows. I do this with washes (paint thinned with water); layer after another while allowing them to dry between layers. |
 7hrs in |
7hrs inWashes of the Umbers on the entire piece. A Cadmium Red Dark gradiant for the sky. Shapes of the clouds are defined with Raw Umber. Clouds are tricky at times. Guess I do all right with them, but they’re not my favorite thing to paint. I also splatter, to give the painting some texture and mood. |
 9hrs in |
9hrs inMore washes with umbers, building up and darkening the shadows of the objects. White is used to pop-out the edges, mask the spillage of some of the washes, and to bring out the details. |
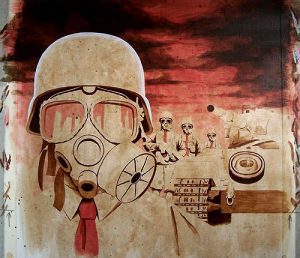
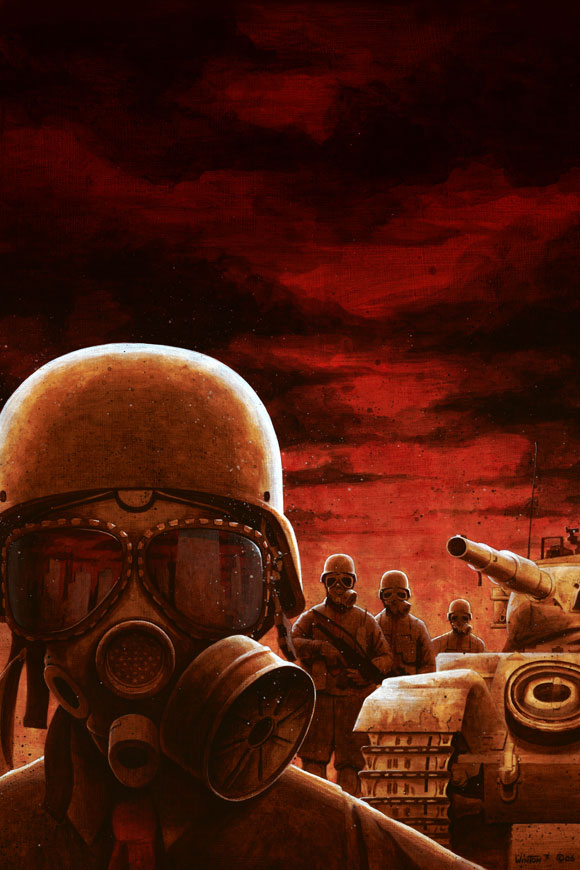
 11hrs in |
11 hrs inThe shadows are darkened some more. Details are finalized, highlights are emphasized, and more spatter is added. I splatter with a toothbrush; flick with one hand while the other masks areas that I don’t want random dots to appear on. |
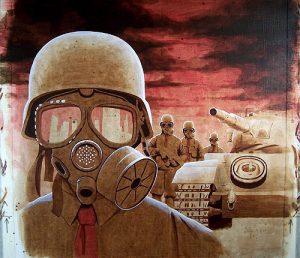
 Scan |
ScanThis was a three part scan… there’s more to the image, more clouds and sky. I had to join the parts in Photoshop. I also adjust the contrast by +20… it punches up the richness of the colors and subdues the grey saturation. |
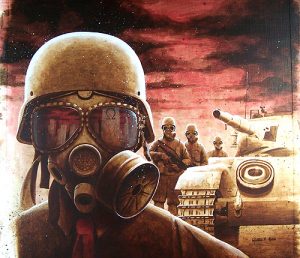
 Digital Edit |
Digital EditAdded a couple of Overlay layers of red color to punch the intensity. I also removed the Omega symbol in the gas mask reflection. It distracted from the overall look. |
 |
|
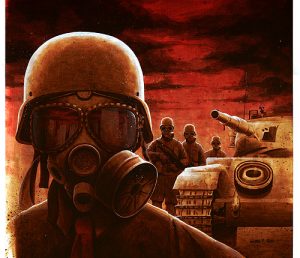
Final ImageComposition cropped and seen with the complete top portion of the painting. |
|
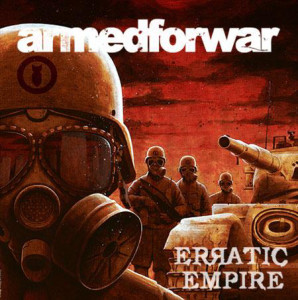 Usage |
UsageAfter handing off the digital files, the client then goes and puts the peice into their desired layout and incorporates text and any other graphic elements. |
I hop you enjoyed this step-by-step reveal. To see close up pics and learn of other information check out this painting in the Gallery HERE.